
Here it is!
Inspired by real copper table photo I found on internet.

I think it can't be easier although you have to put some work on it.;)
So there goes short "turtorial": all you need is 3 wooden pieces:

One cut-out piece for the top - which actually I cut out earlier to be ... the table top of another table, lol.
And two turned.... egg holders, which I found in a shop offering (almost) all you need for creative people.;)
(Okay, I know it's not the first time I am using egg holders for miniatures but I do think they can be use in 1/12 scale in many ways.;))
Of course you have to polish all three piece and shorten egg holders a bit to the height of 1/12 table.
Then find a centre of the table top,

and glue everything together - this is upside down view.;)

All you need now is to paint. Remember my table is a "copper" one so I used a few colours to create this look.:)

And make"copper" looking in different stage of "aging".

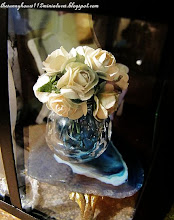
And decorate the way you wish.:)

Have fun!
Oh, one more thing:
some of my Friends liked little elephant a lot. If anyone of you would like to have it please let me know I will have to check it but I hope to get a few more so email me please.
The same goes to egg holders - if anyone would be interested in having them email me please.
***
Króciutka instrukcja jak w najprostszy sposób zrobić stół z toczoną nogą.:):) Mój "miedziany" stół został zainspirowany zdjęciem miedzianego stołu w skali 1:1, które znalazłam w internecie.;)
Wszystko czego potrzebujecie to 3 drewniane części: jedna na blat - tutaj musicie wykazać trochę pracy i wyciąć sobie prostokąt o właściwej wielkości.;), dwie pozostałe części to..."kieliszki" na jajka znalezione w sklepie dla osób kreatywnych.:):)
Znów trzeba nad nimi nieco popracować: oszlifować wszystkie części i skrócić kieliszki do potrzebnej wysokości.
Później należy już tylko znaleźć środek na blacie i skleić kieliszki ze sobą i gotową nogę przykleić do blatu.:) Stolik gotowy!
Teraz już tylko od Waszej kreatywności zależy jego kolor i dekoracja.:):) Miłej zabawy!!


23 comments:
Интересная работа!
Спасибо за идею и за то, что показали, как это сделать!
Татьяна
Thanks for this fantastic tutorial.
Your table in fabulous.
Greetings, Faby
Very very beautifully made. I love the color you have chosen. Thanks for showing.
Hugs
Wyrna
Thank you for the tutorial, Ewa. Your table is gorgeous! xo Jennifer
Your table is superb! Thanks for sharing your tutorial.
Hugs, Drora
Very creative re-use of materials! You did a great job with the verdigris finish.
XOXO,
John
Thanks Ewa. The table is beautiful! ;)
You always have the miniature view on everything... eggholders - very clever! A beautiful table, thanks for sharing!
Hugs
Birgit
Hi Ewa, your table looks great with the "copper" color, thanks for sharing the tutorial! Yes, we miniaturists we can use a lot things, isn't it ;)?
Have a good week. Hugs, Ilona
Oh, Wonderfu!
Una mesa preciosa!!!Gracias por el tutorial!!
Besos.
Fajny pomysł z tymi kieliszkami :)
Thanks for showing how you make this beautiful table! It looks great with the patina!
I´m not one of your blog friends that likes the little elephant... I LOVE it *giggle*
Have a great week!
Hugs Melli
Thank you for this very fine tutorial!
Hugs
Kikka
Dzięki za podzielenie się pomysłem,
ale tajemnica uroku tego pięknego stoliczka nie tkwi bynajmniej w konstrukcji, ale w sposobie jego wyjątkowego i niepowtarzalnego wykończenia, do którego konieczny jest przede wszystkim talent i umiejętności, gratuluję, bo efekt fantastyczny
Hello Ewa,
The finished table is wonderful. You got the effect just right. Excellent work.
Big hug,
Giac
Rewelacyjny stolik. Bardzo efektowny na zdjęciu, ale na żywo... niesamowity.
Dziękuję Ewo za sympatyczne przyjęcie w Twojej pracowni. Miło było się spotkać. Jestem pełna uznania dla Twojego talentu.
Pozdrawiam serdecznie ze Świdnicy :)
que bueno...
Jaki fajny pomysł i instrukcja:) Wyszło ci jak zwykle cudownie^^ Muszę chyba i ja kiedyś spróbować... albo przynajmniej sobie sprawić coś takiego hihi:)
Pozdrawiam!
Ewa, You are a Natural for Furniture Making! This Table looks beautiful.... and now we all know how to make one too! I think I will have to try one in "marble" effect for my "Someday" Garden I am Dreaming of! Do you think I will ever get caught up with my Projects? Lol!!! Well, I can Dream....!
Nogę można zrobić z tzw. tralek wykorzystywanych min. w zegarach. Znaleźć je można na allegro. Sprzedają ją najczęściej producenci, więc idzie utargować żeby zrobił takie na zamówienie (wystarczy rysunek). Wiem bo mój ojciec ostatnio zamawiał do jednego zegara jakiś nietypowe.
I didn't realise I miss so many of your posts , Ewalina! Think I saw this one on fb and thought I have read it here already. It is a little confusing eh? So many media now that we are on, fb, blogger, twitter, pinterest.
I think you did a fabulous job "coppertanning" this wooden table. It looks exactly like how oxidised copper looks :). And speaking of egg holders, do you know you can really oxidise copper with egg ? :)
Muchas gracias por compartir Ewa.
Te ha quedado genial!!
besitos ascension
Post a Comment